

How to Clean Stainless Steel Kitchen Gadgets Safely
Table of Contents
- Step 1: Gather the Right Tools and Non-Abrasive Supplies
- Step 2: Daily Cleaning Routine for Stainless Steel Kitchen Gadgets
- Step 3: How to Remove Rust from Stainless Steel Utensils
- Step 4: Natural Ways to Clean Stainless Steel Without Harsh Chemicals
- Step 5: Choosing the Best Stainless Steel Cleaner for Kitchen Gadgets
- Step 6: Deep Cleaning Burnt-On Food and Stubborn Stains
- Step 7: Polishing, Buffing, and Preventative Maintenance for Long-Term Shine
- Common Mistakes to Avoid When Cleaning Stainless Steel
- Frequently Asked Questions
Last Updated: September 16, 2026
Step 1: Gather the Right Tools and Non-Abrasive Supplies
The best way to protect stainless steel kitchen gadgets is to start with the right supplies before you touch the surface. Abrasive pads and steel wool scratch the protective chromium oxide layer, and those scratches become traps for grease, water spots, and corrosion.
Here's what belongs in your kit:
- Microfiber cloths (at least two, one for washing, one for drying)
- Mild dish soap, ideally pH-neutral
- Baking soda for paste and deodorizing
- White vinegar for water spots and light discoloration
- A soft sponge or nylon brush for textured handles and grates
- Warm water in a separate bowl or basin
Skip anything labeled "heavy-duty scrub" or "steel wool." Stainless steel is not scratch-proof; it resists corrosion because of that thin chromium oxide film, and abrasive pads strip it away.
USDA Food Safety guidance on cleaning food-contact surfaces
Step 2: Daily Cleaning Routine for Stainless Steel Kitchen Gadgets
Daily cleaning takes under two minutes per item and prevents the buildup that turns into a deep-clean project later. Warm water, a drop of dish soap, and a microfiber cloth handle almost everything.
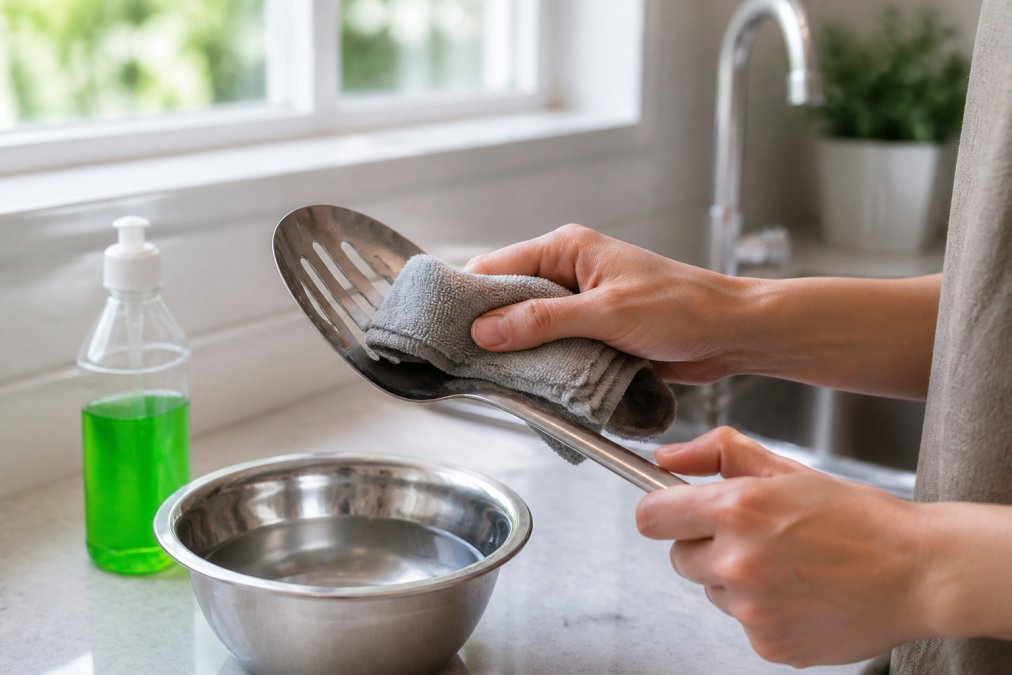
Follow this sequence:
- Rinse the gadget under warm running water to loosen food residue.
- Apply a drop of dish soap to a damp microfiber cloth.
- Wipe in the direction of the grain, not in circles.
- Rinse thoroughly so no soap residue remains.
- Dry immediately with a second, dry microfiber cloth.
That last step matters more than most people realize. Air-drying leaves minerals behind, and those become the water spots that etch into the surface over time. This daily habit is the single most effective form of preventative maintenance for long-term shine.
Step 3: How to Remove Rust from Stainless Steel Utensils
Rust on stainless steel is usually surface-level and removable at home. Stainless steel contains chromium, which forms a passive oxide layer that resists corrosion, but that layer breaks down when the metal sits in moisture, contacts salt, or gets scratched.
Baking Soda Paste for Light Rust Spots
Mix three parts baking soda with one part water until you get a thick paste. Apply it to the rust spot, let it sit for 15 to 20 minutes, then scrub gently along the grain with a soft sponge. Rinse and dry completely. For heavier spotting, add a few drops of lemon juice to the paste, but don't leave acidic mixtures on the surface for more than a few minutes.
When to Use a Commercial Rust Remover
For rust that has pitted the surface or spread across a large area, a commercial rust remover formulated for stainless steel is the practical choice. Look for products labeled safe for food-contact surfaces, and follow the dwell time on the label exactly. Rinse thoroughly afterward. If rust keeps returning in the same spot, the passive layer is compromised and the item may need replacing.
Step 4: Natural Ways to Clean Stainless Steel Without Harsh Chemicals
Natural cleaning solutions handle most everyday messes on stainless steel without the fumes or residue of commercial degreasers. But "natural" is not automatically "safe to eat off of," and that distinction is where most guides stop short. The two combinations below cover nearly every situation, and the section after them explains how to make sure nothing is left behind on a food-contact surface.
Vinegar and Dish Soap Solution
Mix equal parts white vinegar and warm water with a few drops of dish soap in a spray bottle. Spray the surface, let it sit for about a minute, then wipe along the grain and dry immediately. This works well on greasy stovetop gadgets and water spots. The mechanism is straightforward: vinegar is dilute acetic acid, and that acidity dissolves the calcium and magnesium minerals in hard-water deposits that plain soap leaves behind. It does not dissolve grease well on its own, which is why the dish soap is in the mix.
Keep the dwell time short. Acetic acid is mild, but leaving it on for extended periods, or using undiluted vinegar, can dull a polished finish over repeated exposure.
Baking Soda for Grease and Odors
Sprinkle baking soda directly onto greasy surfaces, add a small amount of warm water to form a paste, and work it gently with a soft sponge.
What "Natural" Leaves Behind on Food-Contact Surfaces
- Rinse with clean running water after every wash. Vinegar, baking soda, and dish soap all rinse clean, but only if you actually rinse. A wipedown is not a rinse.
- Do not use essential-oil "kitchen sprays" on food-contact surfaces. Many DIY recipes call for lemon, tea tree, or orange oil. These smell clean and cut grease, but they are not formulated or evaluated for food-contact use, and they leave an oily film that can transfer to food.
- Skip the lemon-juice-and-salt rust hack on anything you eat off of. It is a popular DIY trick, but salt is a chloride, and chlorides are exactly what attacks the passive layer on stainless steel. You may remove the rust spot and seed the next one.
Natural cleaners are safe on food-contact stainless steel when you use them one at a time, keep dwell times short, and rinse thoroughly with clean water. The risk is not the ingredient, it is the residue you leave behind.
EPA Safer Choice product standards for cleaning products
Step 5: Choosing the Best Stainless Steel Cleaner for Kitchen Gadgets
When shopping, check the label for these markers:
| Cleaner Type | Best For | Watch Out For |
|---|---|---|
| pH-neutral spray | Daily wipe-downs | Little degreasing power |
| Dish soap and water | Most routine cleaning | Residue if not rinsed |
| Vinegar solution | Water spots, light tarnish | Never mix with bleach |
| Baking soda paste | Grease, odors, light rust | Rinse fully, can leave film |
| Commercial stainless polish | Fingerprint-resistant finish | Read label for chlorides |
EPA Safer Choice product standards for cleaning products
Step 6: Deep Cleaning Burnt-On Food and Stubborn Stains
Burnt-on food needs patience rather than force.
Step 7: Polishing, Buffing, and Preventative Maintenance for Long-Term Shine
Preventative habits matter more than any product:
- Dry gadgets immediately after washing
- Store utensils in a dry drawer or rack, not a damp sink
- Avoid letting acidic foods sit on stainless surfaces
- Rinse salt off cookware promptly, since salt accelerates pitting
Common Mistakes to Avoid When Cleaning Stainless Steel
Most damage to stainless steel kitchen gadgets comes from habits that seem harmless but aren't.
Why Some Gadgets Rust and Others Don't: 304 vs. 316
If two stainless utensils get the same care and only one rusts, the difference is usually the grade.
Preventative Care That Prevents Oxidation
- Dry immediately after every wash. The single highest-impact habit.
- Store utensils in a dry drawer or rack, never a damp sink. Standing moisture is the leading cause of surface rust on 304.
- Do not let acidic foods, tomato, citrus, vinegar, sit on stainless surfaces. Brief contact is fine; overnight contact is not.
- Rinse salt off cookware as soon as you are done. Salt accelerates pitting, especially on 304.
- Reapply a thin coat of mineral oil monthly on frequently used utensils. It fills microscopic surface texture and keeps moisture off the metal.
FDA guidance on food-contact substances and materials
Frequently Asked Questions
What cleaner is safe on stainless steel kitchen gadgets?
For everyday cleaning, warm water with a few drops of mild dish soap is safe. For tougher jobs, a paste of baking soda and water or a 50/50 mix of white vinegar and water works well. Always use a non-abrasive microfiber cloth or soft sponge, and rinse thoroughly. Avoid cleaners containing bleach, chlorine, or ammonia, as these can damage the protective layer and cause discoloration.
What should you not use to clean stainless steel appliances or gadgets?
Never use steel wool, abrasive pads, or scouring powders on stainless steel. These scratch the surface and remove the passive layer that protects against corrosion. Also avoid bleach, chlorine-based cleaners, and anything with hydrochloric acid. Oven cleaners and harsh degreasers can also cause pitting. Stick to pH-neutral or mildly alkaline cleaners and always rub in the direction of the grain to prevent visible scratches.
Can I use Dawn to clean my stainless steel kitchen tools?
Yes, Dawn or any mild dish soap is safe for stainless steel. It effectively cuts grease without harming the surface. Mix a few drops in warm water, wipe with a microfiber cloth, then rinse and dry immediately to prevent water spots. For stuck-on food, let the utensil soak in soapy water for 10-15 minutes before wiping. Avoid lemon-scented or bleach-containing dish soaps, as they may leave residue or cause discoloration.
Is vinegar safe for cleaning stainless steel kitchen tools?
White vinegar is safe when diluted and used occasionally. Its acidity helps remove water spots, light rust, and tarnish. Mix equal parts vinegar and water, wipe, then rinse thoroughly and dry. Do not leave vinegar on the surface for long periods, as prolonged acid exposure can damage the finish. For regular cleaning, mild dish soap is gentler. Never mix vinegar with bleach, as it creates toxic chlorine gas.
Stainless steel rewards consistency more than effort. A two-minute daily routine, the right non-abrasive supplies, and a monthly polish will keep your kitchen gadgets looking new for years. When you're ready to upgrade worn utensils or add pieces built to last, ShopVerse.life offers curated kitchen essentials backed by fast shipping, secure payments, and a money-back guarantee. Get started with ShopVerse.life and give your kitchen tools the care they deserve.